
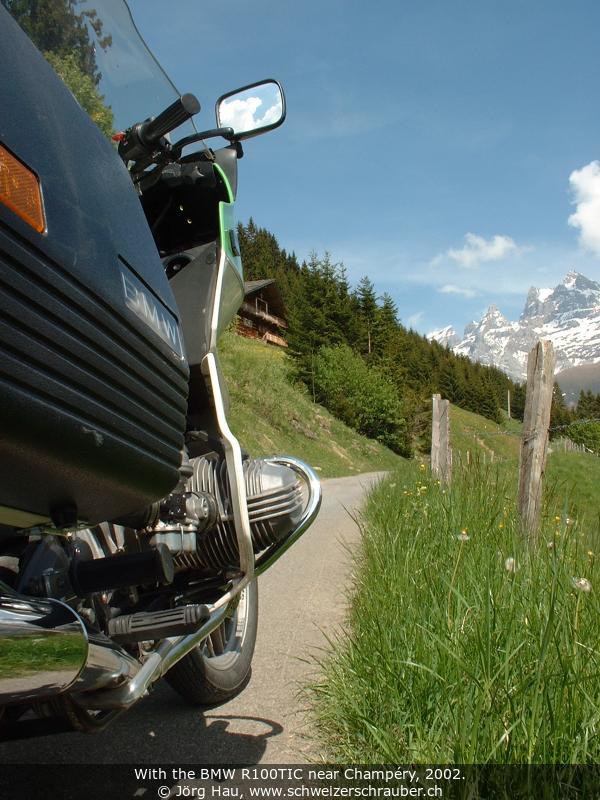

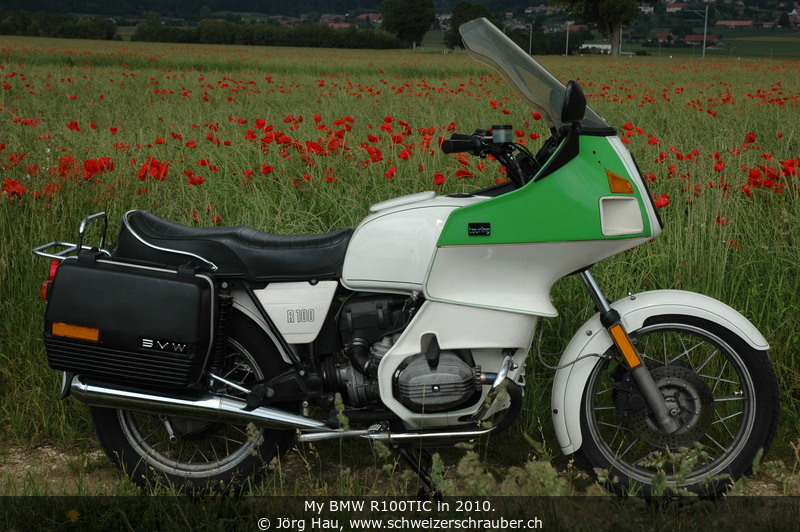

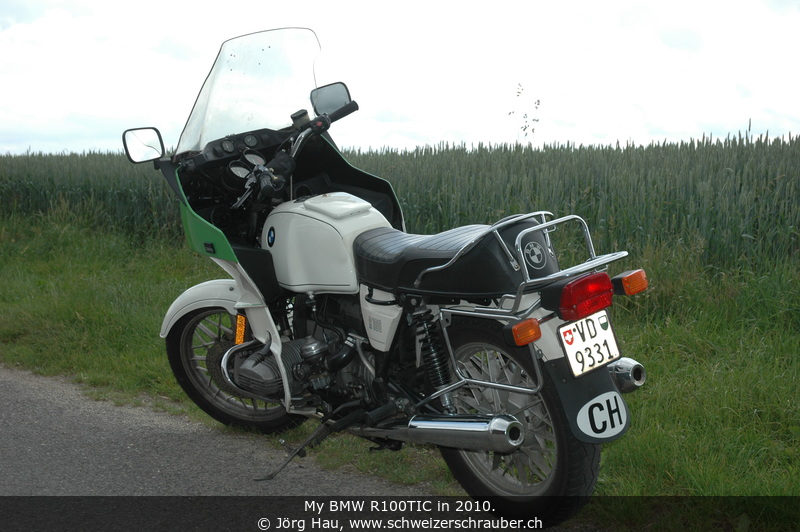
This page is about my BMW R100TIC, the police version of the BMW R100. I owned this bike from 2002 through 2010 and rode about 31000 km in this time.
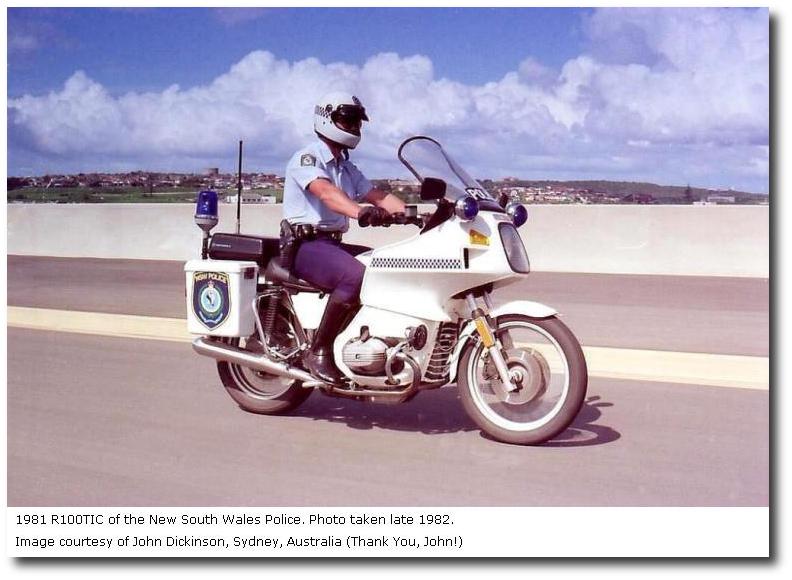
The R100TIC is a special version of the R100, which was developed by BMW to satisfy the needs of clients such as police units. Basically, this is a "naked" R100 which was fitted with the fairing from the R100RT. The main differences to the R100RT are the drum brake for the rear wheel (the RT has a disk) and the engine: The R100TIC has the low-compression 67-HP engine, while the RT was equipped with the 70-HP high-compression engine and oil cooler.
(For more photos of the police bike shown on the right, see John's photos!)
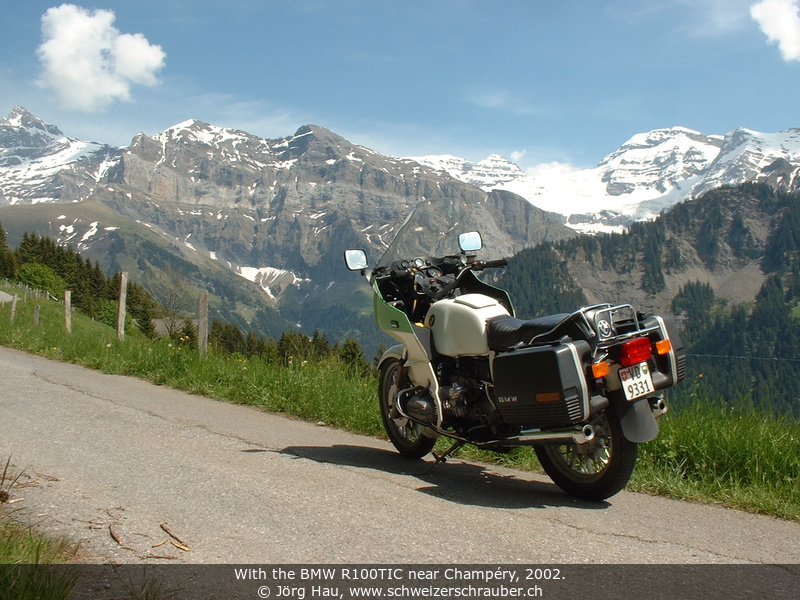
 My R100TIC is indeed a former Swiss police bike, but with two particularities:
The colour scheme and the engine. I did not know that Swiss police units, at least in the Lausanne region, ever used green-and-white;
I only knew a similar colour combination from Germany ... and it seems indeed that one of the previous owners had done this particular paint job.
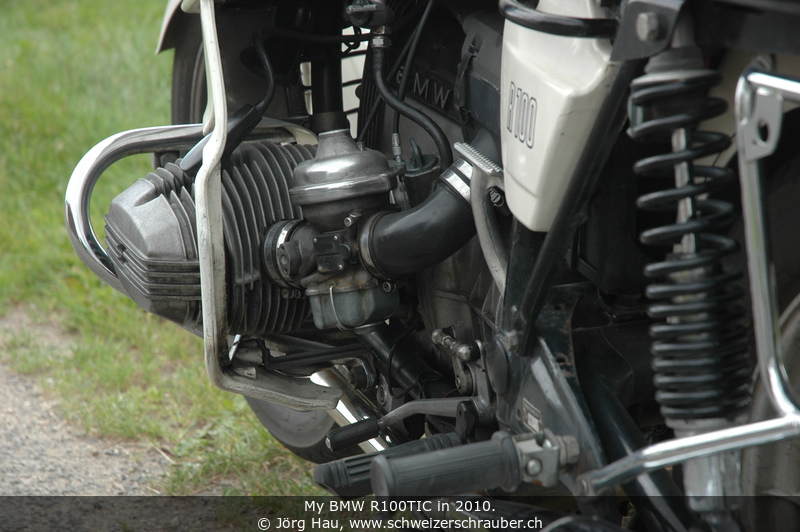
And this is indeed the 980-ccm engine, which is rarely found in Switzerland (due to exhaust and noise regulations).
My R100TIC is indeed a former Swiss police bike, but with two particularities:
The colour scheme and the engine. I did not know that Swiss police units, at least in the Lausanne region, ever used green-and-white;
I only knew a similar colour combination from Germany ... and it seems indeed that one of the previous owners had done this particular paint job.
And this is indeed the 980-ccm engine, which is rarely found in Switzerland (due to exhaust and noise regulations).
I accidently "met" this bike while my trusty R80GS needed a gearbox repair. I had always liked the fairing of the early BMW RT and there she was, green/white, in pretty good shape, some 75 Mm on the counter, clutch and gearbox changed 25 Mm ago, exhaust pipes new, the service had just been done, tires were new ... well, I finally "did it" and the RT was mine from May 2002 onwards.
One of the things that I really like on the bike is - of course - the fairing. It provides excellent protection from wind and weather. Yes, in summer it is like a sauna, but as soon as conditions get a bit fresh it is just perfect. If it rains, you can stay dry for quite a long while (provided you do not need to stop ;-).
Another nice thing is that the RT provides lots of storage space: Apart from the two "glove boxes" in the fairing, there is a huge tooltray under the seat (much larger than the tray of the GS models and with a rainproof rubber cover!) and a small compartment on top of the gas tank (which is, by the way, not waterproof).
And there is, of course, the engine. This good old 980-ccm engine starts to run where my trusty R80GS begins to have breathing problems. One thing that I found astonishing is that the engine, albeit very powerful, is not as "elastic" as that of the R80GS. On the GS, it is no problem to ride the motorcycle with 2000/min and then to accelerate ... on the RT, the engine runs rather rough at 2000/min and to accelerate smoothly I need to keep the revs above ca. 2700/min.
It is worth noting that the TIC has a "short" 33:11 final drive, resulting in excellent sprinter capabilities but also rather high revs on the highway: 5000/min are already reached at only 130 km/h (measured using GPS - I should verify the tachometer since the theoretical speed is 138 km/h). If I use the bike for daily commuting, gas consumption is around 6 l/100 km. During longer trips, consumption drops to a moderate 5.5 l/100 km ... even on the highway.
The good fairing, the powerful engine and the moderate gas consumption make the bike truly convenient for long-distance riding. In addition, the seat is the thick "sofa" from the /7 series, which (in spite of its old-fashioned look) is very comfortable - reportedly much more than the seat of the later RT and RS models.
On the downside, a few points to note:
The centerstand was almost unusuable. Now fixed - see below.
And, well, ... the brakes. Tn their original state, they represent the development as it was back in the late 1970s. Coming from the R80GS with its steel-lined brake lines, I quickly learned that the RT needs a sound amount of "planning ahead", due to its weight and the old brake system. I could, however, improve braking behaviour by changing the brake liners to another brand and replacing the old rubber brake lines against steel-lined tubing (see below).
Standard BMW luggage, found secondhand. The bags fit nicely to the standard carrier frame and are very well integrated into the bike, as they protrude very far "inside" towards the rear wheel. Their size makes it very easy to fit a helmet in there. On the downside: These bags are not fully waterproof. Another - minor - inconvenience is that you have to remove the right bag to open the seat, as it flips over to the right side.
The R100 is originally equipped with Boge shocks, which are "not bad". However, with more than 80 Mm, the shocks of my bike were showing signs of wear: on bumpy roads I could not go as fast as the frame would allow and on fast highway roads the rear end started to feel a bit "wobbly". In other words, damping was too weak.
From my previous positive experience with Koni shocks on my Suzuki GSX, I went looking for Konis again. While Koni has stopped making motorcycle shocks around the year 2000, their shocks are now manufactured in license by an australian company. In 2003-04, I obtained the 7610-1298 shocks with progressive springs for 400 AUD plus 40 AUD for shipping to Switzerland, which comes down to an overall price of some 375 CHF or 250 EUR (plus Swiss VAT; about 45 CHF). A fair price for a good pair of shocks.
The only thing that I can complain about is that the springs that were delivered with the shocks are a bit weak. Already when riding solo (93 kg) I have to use the second pre-load position, and riding two-up with luggage the springs are definitively too weak since they frequently bottom out on bumpy roads. However, the damping behaviour is just perfect.
I did not modify the front fork as it behaves quite comfortably. The oil viscosity that matches the characteristics of the rear shocks best is SAE 10W.
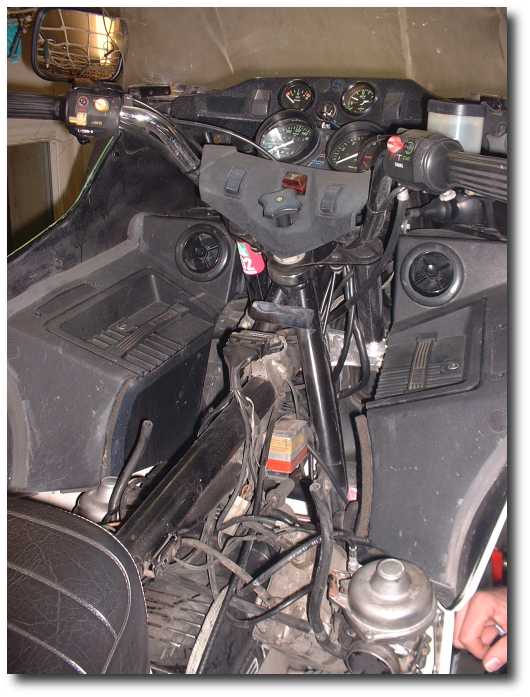
A problem with the original handlebar is that the switches collide with a tank bag. In particular, both the light switch on the left panel and the engine kill switch on the right side are switched downwards if they enter in contact with a tankbag. While the light switch might not be that important, the kill switch stopping the engine is not a good surprise when you're manoevering on a steep gravel road ;-)
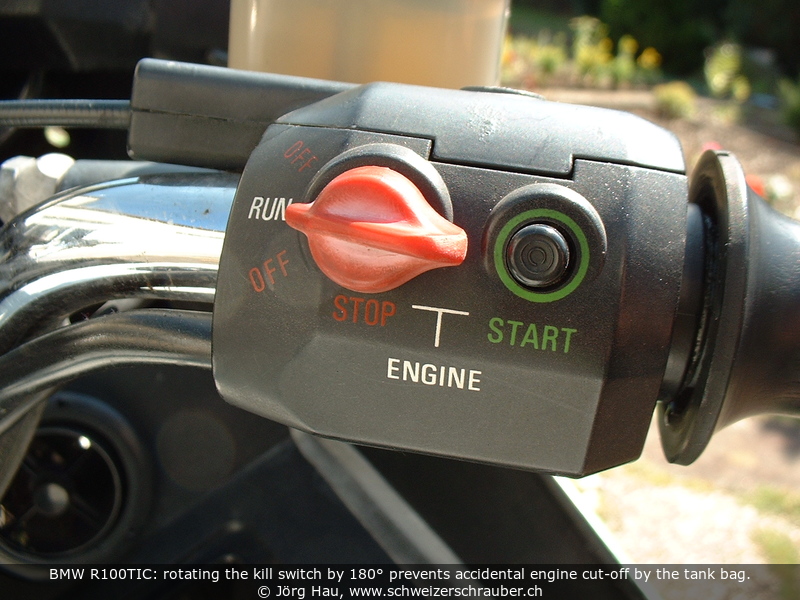 The solution for this problem is pretty easy and consists in turning the switch
around by 180 degrees. To do so, remove the switch unit from the handlebar (one
Philips screw beneath the unit). Carefully hold the kill switch in its place
(it is spring loaded) and remove the small circlip that secures the switch lever
on the back. Withdraw the lever and shorten the huge "blade" appropriately;
in addition, remove the small "nose" that prevents the switch from being
"over-turned" (the switch can now be turned around completely,
however I do not consider this as a problem). Then, re-install the switch
but turn it 180 degrees so that the larger "blade" faces the outer side of
the instrument cluster. The shortened lever will no longer be switched by
the tank bag.
The solution for this problem is pretty easy and consists in turning the switch
around by 180 degrees. To do so, remove the switch unit from the handlebar (one
Philips screw beneath the unit). Carefully hold the kill switch in its place
(it is spring loaded) and remove the small circlip that secures the switch lever
on the back. Withdraw the lever and shorten the huge "blade" appropriately;
in addition, remove the small "nose" that prevents the switch from being
"over-turned" (the switch can now be turned around completely,
however I do not consider this as a problem). Then, re-install the switch
but turn it 180 degrees so that the larger "blade" faces the outer side of
the instrument cluster. The shortened lever will no longer be switched by
the tank bag.
The same procedure can be applied to the light switch on the left unit. On my bike, I simply cut the "too-long" end of the light switch off, but what remains is not as easy to switch as the inverted kill switch that I just described. So, better go with the less straightforward, but much more elegant solution above ;-)
Many thanks to Matthias Otto for pointing me to this solution (and warning me about the spring-loaded switch assembly)! Hans H. provided the German description of this modification.
The original (rubber) brake lines should be changed every 4 to 6 years. When I acquired the bike, it was still equipped with the original (21 year old) rubber lines ... which I quickly exchanged against a set of stainless steel brake lines from Spiegler at 81500 km. The brake was then much more precise to handle, yet the braking efficiency did not improve at all.
Thus, the next step was to change the original brake liners (from BMW/Textar) against sinter metal liners from SBS (type 506HF). Indeed, although the old liners were far from being used up, braking performance did improve significantly. I can only presume that the old liners, installed by the previous owner, were simply inappropriate.
Yet another idea would be to change the master brake cylinder at the handlebar; BMW used a 16-mm piston from 1980-09 to 1981-09 (including mine) but switched to a 15-mm cylinder for the later models. The smaller cylinder yields a higher pressure.
The BMW rims are not suited for running tubeless, so the tires must be used with tubes (although the "H" sizes are usually TL types). When I acquired the R100, she was equipped with Metzeler ME11 3.25H19 on the front and ME77 4.00H18 on the rear. Both tires are not bad, but somewhat out-of date and I do not feel as well with them as I did on my Suzuki GSX400 (which used the same type and almost the same size). Especially on wet road, the ME77 is surprisingly slippery. After barely 5000 km, the rear tire was used up.
I then switched to Bridgestone BT45, using the same tire sizes as above (you can also use the "metric" sizes 100/90H19 and 120/90H18, but I did not try that yet). This tire fits the bike perfectly well, sticks to the road "like glue" and does especially not show any problems on wet roads. Usual pressure is 2.5 bar on the front and 2.8 bar on the rear wheel, respectively. With my riding style, lifetime is between 5000 and 6500 km on the rear wheel, and between 7500 and 9500 km on the front. The front tire develops an interesting wear pattern: it wears out on the sides first, leading to a sawtooth pattern. When the bike starts to behave unstable at higher speeds (wobbling), it's time to change the tire! - The only downside of this tire is that it guides not very well on loose ground such as gravel roads (which are easy to ride with this bike, provided you pay some attention to the ground clearance ;-).
The early RT models were delivered with a maximum allowed (gross) weight of 398 kg. Now, already empty the R100TIC has a weight of 245 kg, which leaves a very modest 153 kg of payload. This means the average rider, a light passenger and a credit card, but not much more ;-)
Later, BMW officially increased the gross weight to 440 kg, allowing a load of 195 kg. This requires an official letter from BMW, which states roughly the following:
Throughout the years, BMW has apparently used two different types of springs in the Bing carburetors.
 The BMW spare parts catalogue tells that until end 1984, a spring with 115 mm length
and about 30 turns has been throughout their model range, from the R45 through R65
up to the R80 and R100. The part number was 13 11 1 335 324.
From 1985 on, the spring changed to 20 turns and an overall length of 120 mm
(part number 13 11 1 338 134). Again, the same springs are used in
all models, both the 40-mm Bings (Type 94) of the R100GS and R100R and the 32-mm (Type 64)
of the "late" R65, R80 and R100.
The BMW spare parts catalogue tells that until end 1984, a spring with 115 mm length
and about 30 turns has been throughout their model range, from the R45 through R65
up to the R80 and R100. The part number was 13 11 1 335 324.
From 1985 on, the spring changed to 20 turns and an overall length of 120 mm
(part number 13 11 1 338 134). Again, the same springs are used in
all models, both the 40-mm Bings (Type 94) of the R100GS and R100R and the 32-mm (Type 64)
of the "late" R65, R80 and R100.
An interesting experiment is to put the "new" springs into the "old" carburetors.
Following a detailed report from Rainer Restat who tried this on his R80G/S, I took the carburetor springs from my trusty R80GS and put them in the R100TIC. The result was ... a smoother idle and a better response to the throttle. In particular in the range between 2000 and 3000/min there was a noticeable difference, which is exactly the zone that I frequently use when strolling through the countryside. At higher rpm, there is no difference.
The "new" spring is harder than the "old" one, so a probable explanation is that the new spring reduces the pressure fluctuations that occur at low rpms inside the carburetor. A possible reason for the better "response" at low throttle is that the harder spring yields a reduced efficient cross-section when you open the throttle. This yields a higher air intake speed, which in turn leads to better filling and thus more "punch".
In conclusion, changing the "old" springs against the new ones is a very simple "tuning" which brings better idle and smoother acceleration at the low end. In addition, the new springs are far from expensive (about 10 CHF or 6.50 EUR a pair), so I really recommend this exchange.
Many thanks to Rainer Restat for this hint and his detailed report!
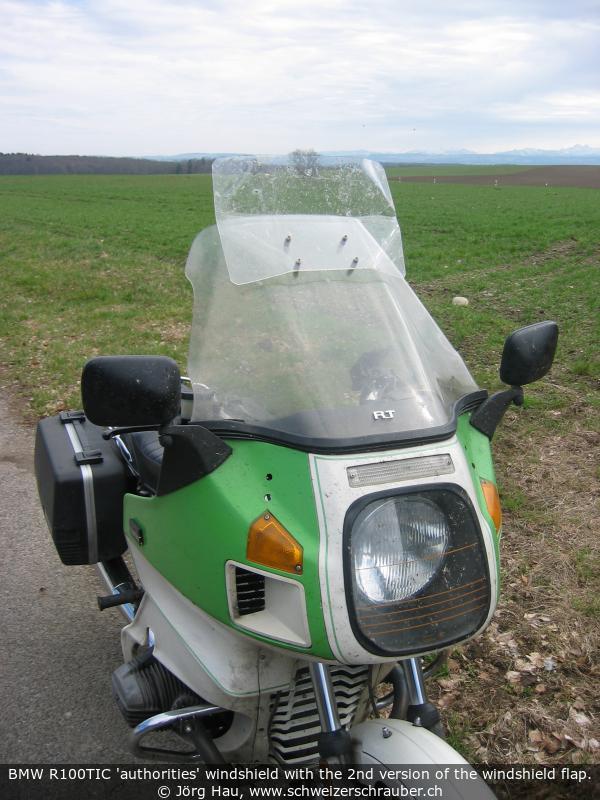
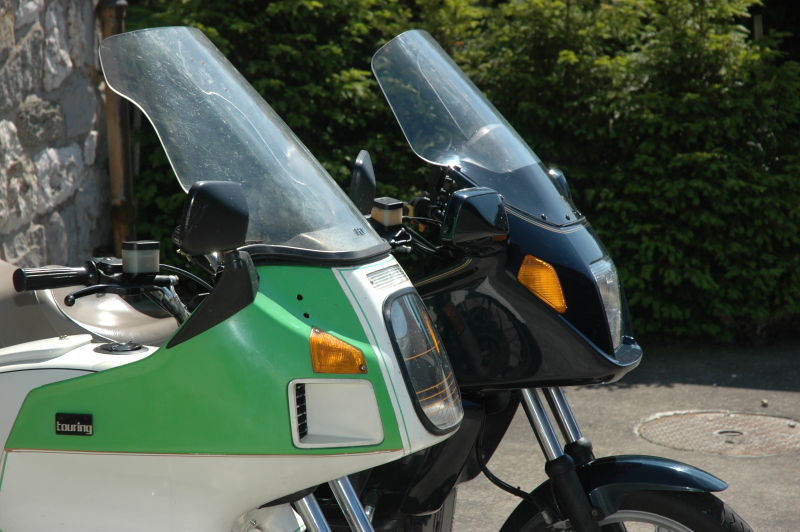
A distinct feature of the RT fairing is the windshield. Two different versions were available at that time, a small "factory stock" windshield and the huge "police" windshield (about 53 cm center height). The latter is what I have installed.
While the weather protection is fabulous, the screen also causes quite some wind noise and turbulences. The screen is adjustable and for a 185-cm person (or shorter), it would probably be perfect. However, I'm 190 cm tall and turbulences and wind buffeting hit my head in any position (using BMW Sys3 and Sys5 helmets):
The resulting wind noise in both cases is considerable and at higher speeds there is noticeable turbulence and buffeting, shaking my head. The latter depends largely upon the speed and the load on the bike (i.e. riding 1-up or 2-up, empty of full tankbag, etc.), but for longer trips, I must use earplugs with high noise damping on this bike.
I have not found a definitive solution to this yet. Early 2007 I started experimenting with an additional "flap" that is bolted on top of the existing windshield.
Update 2009-05: I have run some experiments with a bigger flap. The vibrations mentioned above have shifted into a higher speed range; I can now ride at 130+ km/h with an open visor and no excessive noise. Unfortunately the part is huge (37 cm width, overall 25 cm height) and not exactly pretty - but well, it works for now.


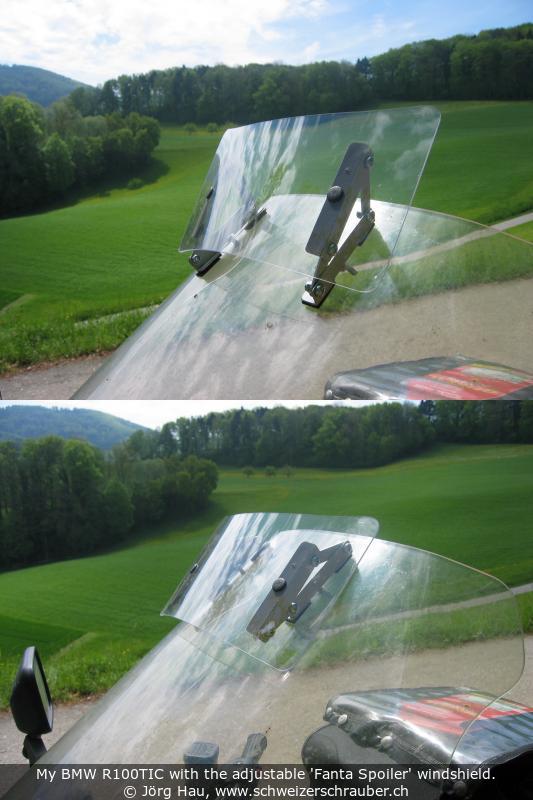
Early 2010, a post in the German Africa Twin Forum pointed me to a home-made spoiler that is produced by a retired engineer in Italy, Gianfranco. Reportedly the device makes use of quite some aerodynamic knowledge, e.g. a precise angle between the windshield and the spoiler. It is called the Fanta Spoiler because it works so fantastico.
Since Venturi was an Italian, too ;-) I asked Gianfranco if he could produce such a spoiler for my TIC and yes he could. I received the unit in May 2010.
The first 2000-km trip with the device was deceiving: Using my standard BMW Sys5 helmet, I still experienced shaking and vibrations; it was roughly as good (or as bad) as my first "flap" described above. Later tests showed that I might have mounted the Fanta spoiler a little bit too high; a short test about 35 mm lower-forward noticeably reduced turbulences.
Things changed when I went an another trip a few weeks later. Due to the summer heat I took my HJC AC-X2E enduro helmet and the result was amazing: Wind noise and vibrations were largely reduced, just a light buffeting was observed and the engine noise was audible so clearly that it started to be disturbing ;-). It would appear that the presence of the helmet shield provides some kind of steady transition (in terms of aerodynamics) which is not oberved with a conventional helmet.
Of course the effect depends somewhat from the environment: Riding behind a truck on the highway, its tailing trubulences will inevitably cause buffeting and noise behind the RT fairing. This is the case with all fairing modifications that I know of.
Further ideas could include experiments with some pressure equalization vent, providing a laminar flow on both sides of the screen and thus preventing the turbulences at the upper edge.
Related links:
As with almost all BMWs of its generation, the R100TIC is equipped with a 25-Ah Battery that is situated under the tool tray, just under the rider's seat. While it is rather easy to control the acid level etc. in built-in position, removal and re-inserting the battery is a real pain: The frame is pretty tight here and the battery fits very "snugly" in its place.
To remove the battery, I usually proceed as follows:
 Re-installation goes exactly in the reverse order. Just make sure you re-connect
the positive pole of the battery first, the ground cable at the very last.
Re-installation goes exactly in the reverse order. Just make sure you re-connect
the positive pole of the battery first, the ground cable at the very last.
A particularity of the R100 is that the standard battery is mounted so that the ventilation line is situated on the left side of the bike. Yet ... when you park the bike on the sidestand, it may well happen that acid leaks out and drops on the battery holder or, worse, the frame. Thus, when the battery needs to be replaced I would definitively fetch a model where the ventilation line is at the negative pole of the battery (the stock 25-Ah battery of all BMW 2V models has the ventilation at the positive pole). Even easier is to install a gel-type battery, i.e. without a vent ... which is what I did in spring 2010.
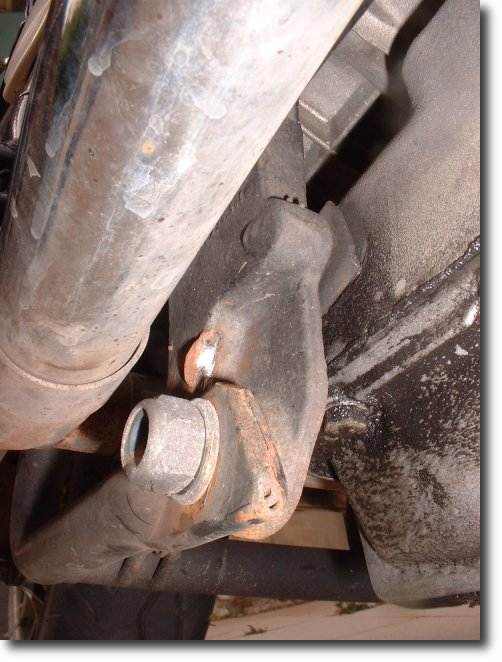
When I obtained this motorcycle, its centerstand was almost unusable. It required a lot of force to lift the bike on the stand (where it was sitting with both wheels touching the ground), and then a lot of force to push it off the stand again. It turned out that this was due to a worn-out centerstand support, a problem that apparently led to the introduction of a changed centerstand design by BMW late 1983.
The worn-out centerstand seems to be a rather common problem. It all starts with loose mounting bolts ... in such a case, the upper centerstand tubes are no longer tightly pressed against the frame annex but have enough play to spread under the weight of the motorcycle. Once this cycle starts, it gets worse every time the bike drops on its centerstand. Over time, the mounting bushes and bolts wear out and the centerstand or the frame annex (eventually both) get damaged.
The repair is basically not too difficult, but it requires welding and hard facing ("Auftragschweissen"). In a few words:
After this repair, the R100 is now perfectly on its centerstand and the wheels come about 5 cm free from the ground. Putting the 245 kg on the centerstand has become easier since the bike does no longer "drop" on the stand and pulling it off the centerstand is much easier since it is no longer required to "lift" the bike off the stand.


Another problem was the fact that the original centerstand is very narrow. The bike is indeed just standing on two small pads, at a distance not much broader than the rear tire. As a consequence, it easily drops over, in particular to the right side - which may not only happen on gravel, but also on hot tarmac. Since the room between the exhaust pipes is rather confined, the installation of a broader centerstand is not feasible.
A simple yet effective improvement is to attach two steel plates to the "feet" of the centerstand. In my case, I used two plates of about 6×8 cm. They were welded while the bike was resting on them, thus providing perfect positioning; the front part was slightly bent upwards to provide a smooth movement.
Another idea came from Andreas Zeiff; he uses a steel plate across the full width of the centerstand, providing even less pressure on the ground.
A big "Thank you" to Alain Gisler in Cheseaux, who did the perfect welding jobs!
When I acquired the R100TIC with 75 Mm, I was told by the dealer that the gearbox had been replaced at about 50 Mm. I did not notice any significant problems while driving, but sometimes changing the gears required some amount of "brute force", in particular when I used the motor brake at higher rpms and wanted to change down. So, when I was asked if I would like to participate in a course dealing with BMW 2V gearbox revision, it was an excellent occasion to investigate this problem.
Removal of the R100 gearbox is actually not that difficult (and pretty much similar to that on the R80GS), but the construction of the R100 is rather compact. Thus, it is a rather time-consuming job; with two persons we needed about one hour to remove the gearbox from the bike. In other words, if you need to have your gearbox revised, you can save a lot of money if you do the removal and re-installation yourself.
The only special tool needed is a 27-mm tubular key (or the 27-mm nut from a ratchet set) and a torque wrench with hex inserts (to readjust the swingarm bearings). Everything else can be done with the stock toolset, yet e.g. a ratchet set will speed up work considerably. There are lots of parts to remove, so I recommend to re-attach all those nuts and bolts to their original place immediately. If you have a digital camera, take lots of pictures ;-)
Here's how we proceeded.
That's it. Have a break!
If your gearbox needs repair and you have to wait for it, this may be a good moment to clean the carburetors, or to inspect the starter motor (now that is perfectly well accessible).
The gearbox overhaul is described in another section on this site. We found that two of the three gearbox shafts had an axial play that was by far out of the tolerance specified by BMW.

Before reinstalling the gearbox, verify two points: first, make sure you can shift through all the gears and back. Second, on the "old" bikes with oil in the swingarm, the seal (Simmerring) at the exit flange must be installed with the springs visible (which is different from the Paralever models!).
Have fun!
After riding my R100TIC for a while, I noticed a "clonking" noise that occurred every time I rode off after a stop. There was apparently no "real failure" related to this, but I found this noise intriguing enough to disassemble the rear drive and look for its origin. At the same time this was a good occasion to have the driveshaft revised; I had noticed during the gearbox revision that the U-joint had developed some play.
Removal of the driveshaft is not very difficult, just somewhat time-consuming. The only special tool needed is a 27-mm tubular key or the 27-mm nut from a ratchet set and a torque wrench with hex inserts (to readjust the swingarm bearings). Everything else can be done with the stock toolset.
Please note that the pictures show far more disassembly than necessary: at the time I revised the driveshaft I also removed the whole rear frame (to re-paint a part of the frame that had been attacked by battery acid).
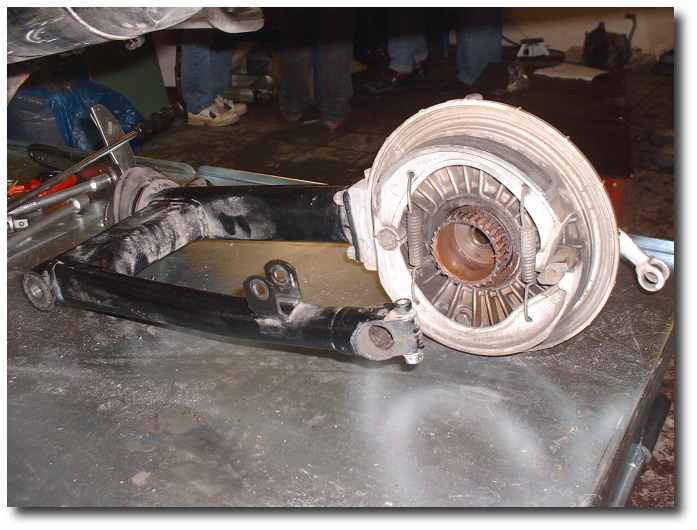
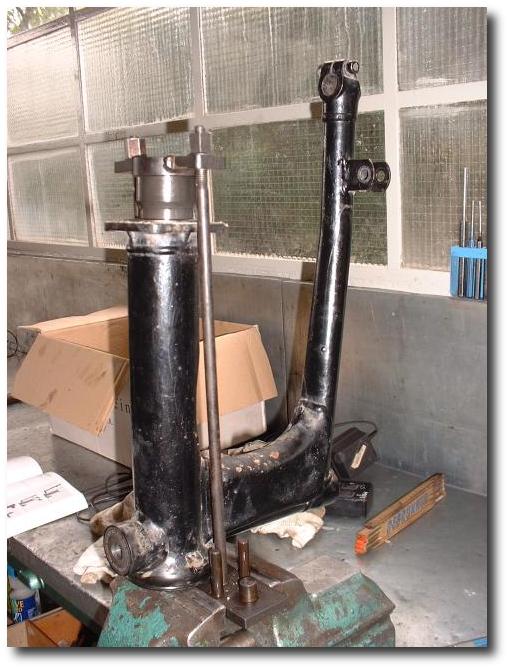
Disassembly (and reassembly) of the shaft drive requires a special tool, essentially a device which allows to compress the inner parts of the driveshaft axially. You may want to borrow this from a friendly BMW dealer (tool number 26 1 700), or maybe build one yourself according to this link.
Usage of this device is rather simple: Mount the complete rear swingarm, so that the driveshaft joint is held in place at the lower end. Use the ring at the top to compress the driveshaft, until the retaining clip becomes fully visible (you may need to use a small hammer to break the parts loose). Remove the clip with a suitable tool, then slowly detend the whole assembly. The complete driveshaft comes apart and can then be extracted from the swingarm housing.
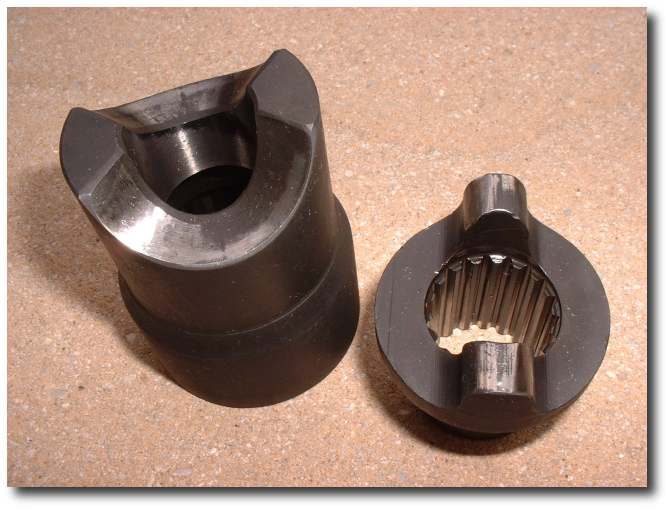
The driveshaft assembly is composed from the following parts (from top to bottom and left to right):


On my motorcycle, the driveshaft U-joint hat developed some play, so I had it replaced at a local company specialised in driveshaft repair. Total cost was 120 CHF, which seems to be a normal price.
Carefully verify the state of the final drive. The "teeth" should not be worn out, and you should be able to rotate the final drive by hand easily.
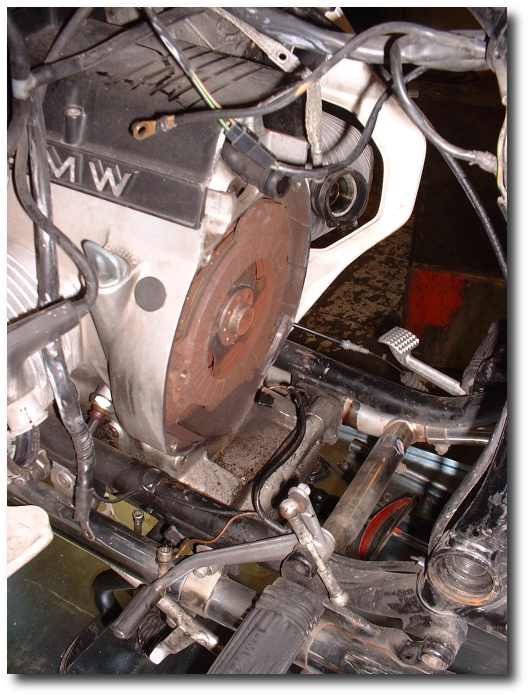
As for the "clonking" noise, there was no visible defect nor excessive wear on the parts of the torsion damper (some blank metal on the clutch and its counterpart are normal). However, it seems that the spring of the torsion damper may wear out. As this part is not that expensive (less than 30 CHF; part number is 16.11.2.237.184), I decided to exchange it against a new one ... and indeed, after assembly I found that the noise had gone! Thus, the problem was truly due to a worn-out spring.
Reassembly of the driveshaft is performed just inverse to the disassembly. Slide the parts from both sides into the rear swingarm, compress the "inner parts" axially using the BMW tool, then use the cone provided to hammer the snap ring back into place. You may want to use a new ring here - part number 26.11.1.237.289; cost is a few cents.
Reinstalling the driveshaft:
A big "Thank you" to Buri Motos in Cugy, who allowed me to use the toolset of his workshop!
I got my R100TIC in 2002-05, 21 years young, with 75000 km on the counter.
81000 km, 2002-09: Found that my predecessor had over-torqued at least two of the valve adjustment screws. One of them needed immediate exchange.
81500 km, 2002-10: Gearbox overhaul (not strictly necessary, but a nice occasion during a workshop). At the same occasion, changed the rubber brake lines against stainless steel lines.
82400 km, 2003-03: The BMW/Oerlikon battery (Type 53030, 30 Ah) failed, only two years after its installation. One of the six cells is apparently "dead", so that the voltage of the fully charged battery drops from 12.4 V to 10.2 V in just 5 days. I replaced it with a barely used Yuasa battery (Y60-N24AL-B). It has a slightly smaller capacity, but also less weight (7.5 kg, compared to 9 kg for the BMW battery).
83080 km, 2003-04: Installed Ikon shock absorbers with progressive springs.
83200 km, 2003-04: Broken spring retainer plate of the sidestand. Exchanged.
83440 km, 2003-06: Changed the front brake liners, due to their insufficient performance. Now using SBS type 506HF (sinter metal).
87000 km, 2004-05: Revised the shaft drive. The gas tank and parts of the fairing that had been "coloured" by a previous owner now received an excellent paint job, done by Alain Gisler (Carosserie de Mon-Repos) in Cheseaux.
88040 km, 2004-08: The left carburetor's membrane was defective. I took the occasion to perform a complete overhaul of both carburetors - cleaned, new gaskets, new needle.
91740 km, 2005-05: Repaired the centerstand.
94940 km, 2006-08: Changed the needle jets (13 11 1 261 702, size 2.66).
100'000 km, passed on 2007-10-12. Nothing particular to report ;-)
102350 km, 2010-05: I did not ride much with this bike during the last two years and the Yuasa battery failed after 7 years. The new one is a Kung Long WP18-12, a gel-type battery with 18 Ah.
105300 km, 2010-06: During a 650-km trip, the throttle return spring of the left carburetor broke. Roadside repair using the choke spring; this is a weaker spring and does not fully pull the carb back to idle, but it's better than nothing ;-) This was actually the first time in 7 years with this bike that I needed to get the tools out during a trip! - When I replaced the spring later on (part number 13111335312), I recognized that one of the choke cables was worn out; changed both.
106400 km, 2010-08-04: Following the acquisition of my K100LT, this bike has been sold.


You may be interested to know that the BMW workshop manual for the R100TIC is available as a regular, official part from BMW. The booklet carries part number 01 50 9 798 460 (german version, printed 6.84; for the english version, the part number is 01 51 9 798 461) and covers everything from the R60/7 up to the R100RS.